Showing posts with label Fresh. Show all posts

Wednesday, August 12, 2015

Summer Corn Salad

This weekend, I ventured to a wondrous farmer's market in Clintonville.  Carts upon stalls upon tents of plump, fresh produce glistened in the morning sun.  Large slabs of local meats and bratwurst contrasted against colorful, country bouquets of wildflowers, sunflowers and poppies, all of which were proudly presented by friendly farmers, eager to share their wares.  I sampled my way through in the true O'Gara way, trying cheeses and dips and even a raspberry dragonfruit soda (a must at my next dinner party).  Christian and I allotted ourselves a whopping $20 and filled our sack with all kinds of goodies, including cherry tomatoes, heirlooms, blackberries and whiskey peppercorn sausages.  With our last $1.50, we even bought a few flowers that are sitting happily on our bar.  We've already decided we're going back again on Saturday.


With our finds at the market, a few stragglers in the fridge and some herbs from our balcony, I made a simple summer salad of corn, tomato, onion, mint & feta.  This summer salad is fresh and bright, healthy and local.  Make this your side dish the next time your grill this season for a delicious, seasonal treat.

Summer Corn Salad

2 Ears of Corn, shucked
1/2 Pint of Cherry Tomatoes, preferably the multicolored kind
1/4 of a Red Onion
1/3 C. Feta Cheese, crumbled
10 Mint Leaves
S&P
Olive Oil
Apple Cider Vinegar

Turn on the grill to medium high heat.  

Generously drizzle the corn with olive oil, salt & pepper.  Grill over medium high heat until many of the kernels have turned golden.  Carefully slice the kernels off the cob and into a large bowl, making sure to collect any milk from the cob.  *SEE TIP BELOW.

Halve your cherry tomatoes and toss them in with the corn.  Thinly slice the red onion and add to the tomatoes and corn.  

Add the feta, a drizzle of olive oil and a tiny splash of vinegar.  Quickly toss the veggies and feta in the oil and vinegar, so they are evenly coated.  

Holding the mint leaves in the palm of your hand, clap your other hand on top, smashing the mint leaves between your palms.  This will release their oils and add fragrance to your salad.  Sprinkle the leaves on top of the salad.  

Enjoy.


TIP:  
To slice the kernels off the corn cob, place a small bowl upside down in a large bowl.  Stand the corn vertically on the base of the small bowl.  Carefully, slice down the side of the cob, letting the kernels cascade into the bowl.  Then, take the back of your knife and scrape the cob in a downward motion, to collect all of the milk left in the cob.  Remove the small bowl and voila!  You've got a bunch of fresh corn in your bowl and a clean station.


Tuesday, February 17, 2015

Roasted Corn Pancakes with Bourbon Pulled Pork & Slaw

Dear fellow foodies, please help me in celebrating Natural Sugar's 100th post!  On such a special occasion, I thought I'd share a recipe with you that brings back one of my best memories from 2014.  Back in September, Christian and I threw a little dinner party.  It was meant to be a quiet dinner for 6 of our close friends.  It bloomed into a dinner extravaganza of 14 to celebrate the end of summer.  It.  was.  fantastic.  Great company combined with delicious food and wine plus wonderful conversation made it a total success.  


Today's recipe is the entree we served at our party:  Roasted Corn Pancakes with Bourbon Pulled Pork, Fresh Veggie Slaw and Spiced Popcorn.  It's a mouthful, literally.  It has several components and takes some time, but I promise you it's worth it!  This dish is whimsical, satiating and full of robust, fresh flavors.  The Roasted Corn Pancakes are soft and savory, the perfect pillow to catch the drippings of the sweet and smokey Bourbon Pulled Pork.  The Fresh Veggie Slaw adds bright flavors and the Spiced Popcorn finishes the dish off with a fun crunch.  Give it a try on a day when you've got time to spend in the kitchen.  You won't be disappointed.  

Roasted Corn Pancakes

1 C. Fresh corn, off the cobb (or frozen)
Olive Oil
S&P
Your favorite pancake batter
Butter

Preheat the oven to broil.  Spread out the corn onto a cookie sheet.  Drizzle with olive oil.  Sprinkle with S&P.  Toss to coat.  Broil until corn is golden brown.  

Fold the roasted corn and S&P into the pancake batter.  

Melt butter in a skillet over medium heat.  Ladle a spoonful of the pancake batter into the skillet.  Cook the pancake until bubbles form or until the bottom turns golden brown, about 2 minutes.  Flip and cook until the other side is golden, about 1 more minute.  Remove from heat.  Repeat with all pancakes.  

Bourbon Pulled Pork

1 lb. Pork Tenderloin (flavored is fine - go for teriyaki or garlic)
Olive Oil
1/2 Red Onion, sliced
1/2 C. Bourbon, divided (I like Bulleit)
Scant 1/4 C. Brown Sugar
S&P

Heat a medium skillet over high heat.  Drizzle olive oil.  When it glistens and the pan is very hot, add the pork tenderloin.  Sear on all sides.  Transfer to a slow cooker.  Add onions to the skillet with about 1/8 C. of the bourbon.  Cook for 3 minutes.  Transfer the onions and bourbon juice into the slow cooker.  Add the remaining bourbon, brown sugar and S&P.  Cook on low for 5-6 hours, or until the pork is cooked through and pulls apart easily with a fork.  Do not overcook.

Fresh Veggie Slaw

1/2 Yellow Pepper
1/2 Red Pepper
1/2 Red Onion
1 C. Fresh Corn
Cilantro, chopped
S&P
1 T. Vinegar (optional)

Thinly slice the peppers and onion and transfer to a medium bowl.  Add the corn and cilantro, S&P and vinegar.  Toss to combine.  

Spiced Popcorn

1 C. Popped Popcorn
Sprinkle of paprika
Sprinkle of cinnamon

To serve, top the roasted corn pancakes with bourbon pulled pork, fresh slaw and popcorn.  

Corn Three Ways:  Roasted, Fresh & Popped

Deepest apologies for such a long delay since my last post.  Since August, my life has completely filled up!  Huge back-to-back work projects + wonderful boyfriend + weekends chock full of fun = no time to talk about and take good pictures of food.  These great pieces of life continue still, but it's about time I jumped back into talking about, eating and photographing one of my favorite things:  FOOD!


Thursday, August 28, 2014

Lamb Burgers over Hummus with Heirloom Tomato Salad

Sometimes, you just have to dig out that old cookbook that hides on your kitchen shelf and make a dish that may not be groundbreaking, but sure is delicious.  This one fits the bill.  These lamb burgers are adapted from a recipe in The Mediterranean Cookbook by Parragon Publishing, and are so simple, you can't help but make them effortlessly.  Christian and I made these gluten-free by substituting crushed corn chips instead of bread crumbs and by serving them on hummus instead of buns. Whether you're gluten free or gluten+, give these babies a try.  These lamb burgers are rich, savory and aromatic and are the perfect Mediterranean meal for a warm summer evening.  


Lamb Burgers over Hummus

1 lb. Ground Lamb
3/4 Onion, finely diced
1 Clove garlic, minced
1 Egg
1 T. Fresh Mint, finely chopped
1 T. Fresh Parsley, finely chopped
1/4 C. crushed corn chips (or bread crumbs for gluten+)
S&P
Olive Oil
Soft Goat Cheese
Hummus

Preheat the oven to broil (or turn the grill to high).

In a large bowl, combine the lamb, onion, garlic, egg, mint, parsley, corn chips, S&P.  Using your hands, mix the ingredients until thoroughly combined.

Form into equal sized patties, indenting the center of them slightly.

Drizzle the patties with olive oil and place on a baking sheet (or carefully onto your cleaned grill).  Cook about 5 minutes, flip and cook for another 4 minutes until browned and slightly crisp on the edges and cooked all the way through.  In the last few minutes of cooking, add a spoonful of goat cheese so that it begins to melt on top.

To serve, smear your favorite hummus on the plate, top with the burger and a sprinkle of parsley & mint.  Serve with Heirloom Tomato Salad (recipe follows) and naan.


Heirloom Tomato Salad

We found some fantastic heirloom tomatoes at the farmers market this weekend and decided to make an extremely simple salad with them to go along with our lamb burgers.  Fresh, cool and crisp, this salad is a perfect balance to any rich, hearty entree.


2 Heirloom Tomatoes, chopped
1/4 C. Kalamata Olives, pitted & halved
Parsley & Basil, ripped
Drizzle of Olive Oil
S&P

In a medium bowl, toss all the ingredients.  Yes, it's THAT easy.  


Wednesday, July 9, 2014

Shish Kebabs

There is not much in this world as satisfying as grilling meat on a stick over flames.  Maybe it's my id, a yearning for simpler times, or gee whiz, maybe it's that fahwesome taste of char and caramelized sugars all over my food that only fire can lend.   In any case, I encourage you to unleash your inner cave man, break out the grill and start cooking like summer intended.  This weekend, my new obsession Christian and I grilled some shish kebabs using my dad's infamous recipe.  These shish kebabs are tender, juicy & fresh, and packed with sweet, teriyaki flavors.  


Shish Kebabs

1/2 lb. of Beef Tips (or your favorite protein), cut in large chunks
Salt & Pepper
Olive Oil
1 Red Pepper, cut in large chunks
1 Pint of Button Mushrooms, with stems on
1 Onion, cut in large chunks
1 Can of Whole Potatoes
1/2 C. Teriyaki Sauce (we used San-J gluten-free)
1 C. Pineapple, cut in large chunks (optional)
Wooden Skewers, soaked in water

Preheat your grill to nice and hot.  Season the beef with salt & pepper.  

Start to assemble the kebabs by starting with a piece of red pepper or onion.  This will secure the pieces so they don't slide off the end of the skewer.  Continue by adding the other ingredients.  Finish the skewer with another red pepper or onion chunk and set the kebabs in a shallow baking dish.  Repeat this until you've used all the ingredients.  

Drizzle your teriyaki sauce over the kebabs, making sure that each piece gets nicely coated.  Drizzle with a smidge of olive oil.  This helps prevent sticking on the grill and helps your food to get an extra crunch.  

When the grill is hot, carefully add the kebabs, perpendicular to the metal grates.  Cook for 5-6 minutes, until you get a good char.  Turn and cook for another 5 minutes on the other side.  Make sure your meat is cooked to a safe temperature.  Remove from the grill.  Drizzle with fresh sauce if you desire (NOT the sauce that collected at the bottom of your baking dish).   Serve with quinoa, couscous and something green.  


Thursday, January 23, 2014

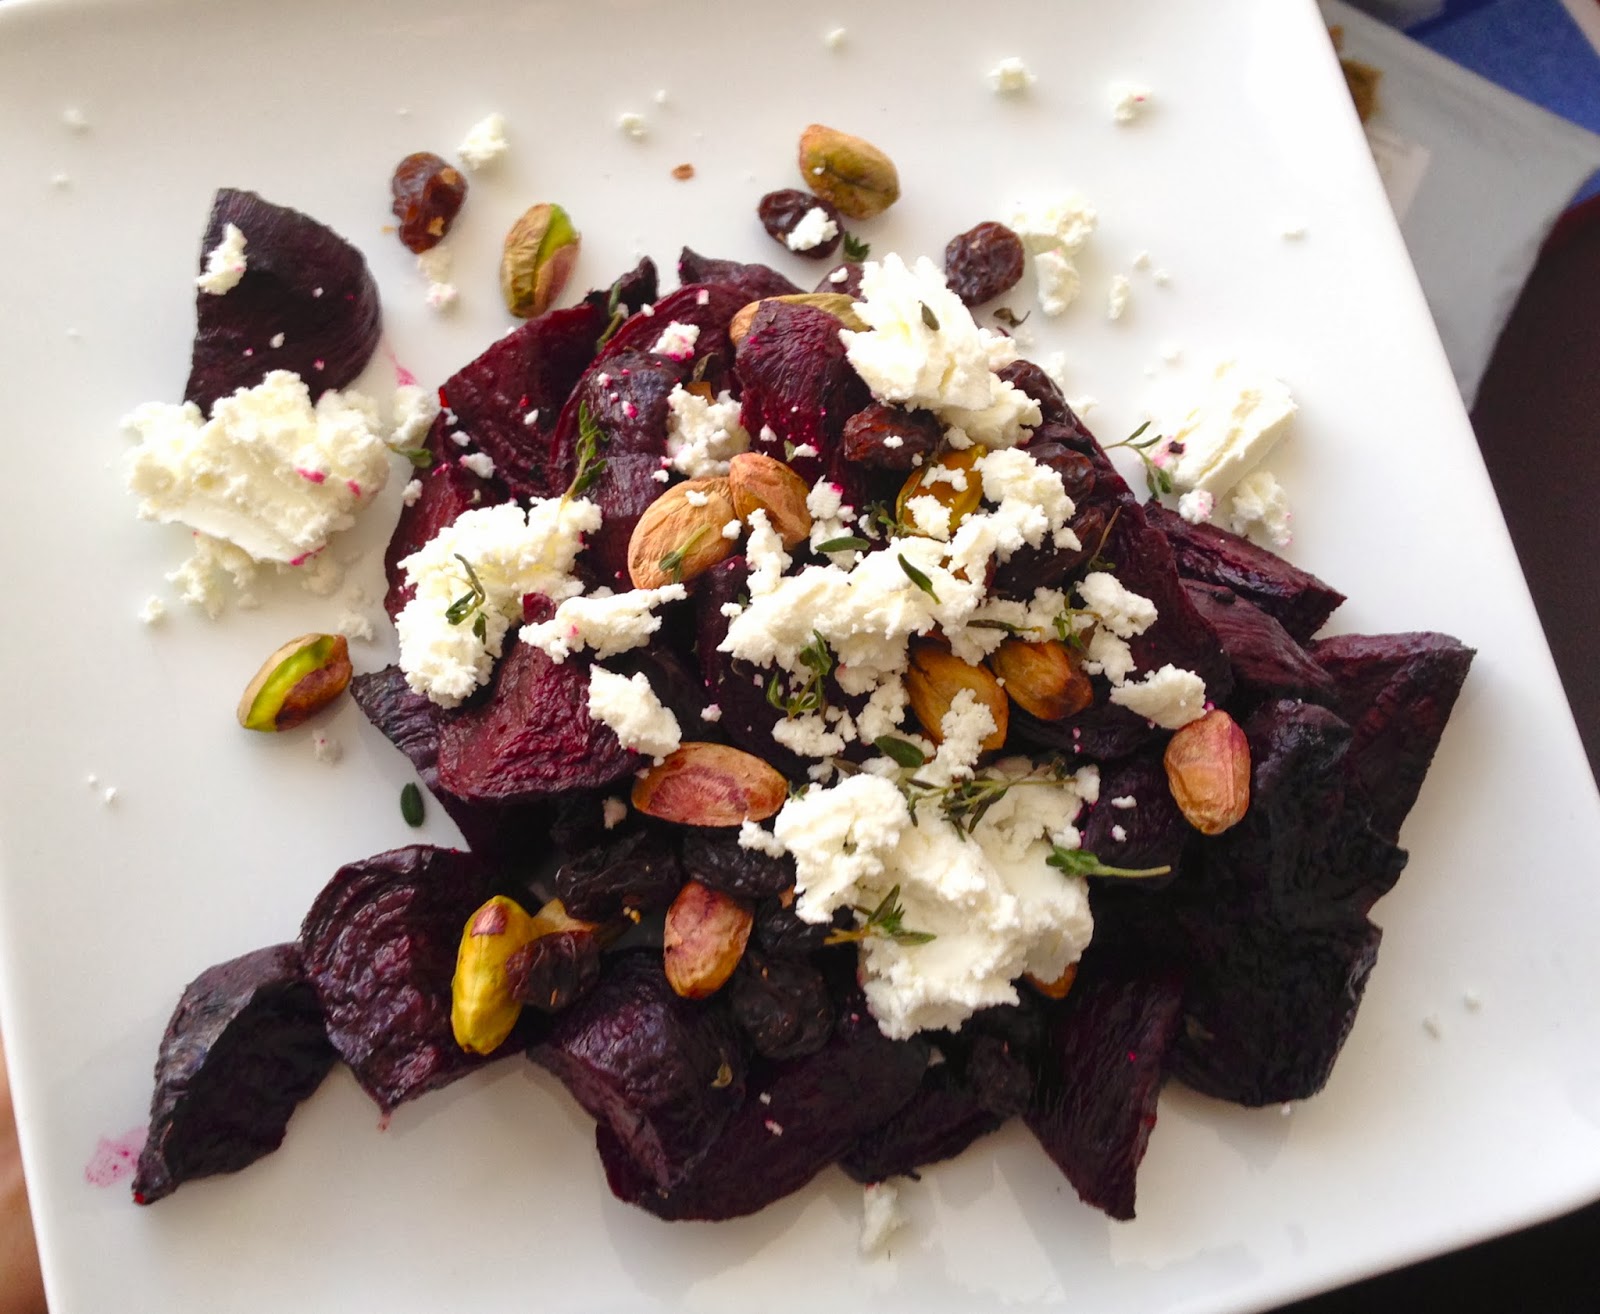
Beet Salad with Goat Cheese & Pistachios

My friend Mike says beets taste like dirt.  To him, this is a positive thing. To me, well, dirt's not my favorite flavor.  I've never been a beet lover but last week on a business trip to Scottsdale, AZ., my mind was changed.  I tried the most delicious version of beets that I've ever had. This recipe is my humble recreation.  Crunchy, creamy and fresh, these beets make the perfect side dish to any meal.  Serve them warm in the winter or cold in the summer.  

Beets are a great source of potassium, fiber and vitamin C.  

6-8 Beets, tops and roots removed, peeled and chopped (or 2 cans of beets, chopped and drained)
2 T. Olive oil
Salt & Pepper
1/4 C. Pistachios, shelled
1/4 C. Raisins
4 oz. Creamy goat cheese
4 Sprigs of thyme

Preheat the oven to 400 degrees.  

In a large bowl, toss the beets, olive oil, salt & pepper.  Spread out on a large baking sheet.  Roast in the oven for about 25-30 minutes, or until the beets are fork-tender.  Remove from the oven and allow to cool slightly.  *If you use canned beets, roasting is not necessary, but will add some more dimension to your dish.  

This salad tastes great hot or cold, so when you're ready to serve, transfer the beets to a serving dish.  Sprinkle with pistachios and raisins.  Crumble the goat cheese over the top and garnish with thyme leaves.  


Tuesday, June 25, 2013

Fish Tacos

Fish Tacos.  They can be really good or they can be RULL bad.  These ones are the former.  Crunchy, zesty, flavorful, fresh and delicious.  They always take me back to the first fish tacos I had, in Oceanside, CA at a restaurant that jutted out into the sea.  They were fabulous.  This is my easy homemade version that you could effortlessly make on a weeknight.  Feel free to switch up the garnish and make them your own!


Fish Tacos
 
Fish Sticks or fillets of white fish, such as tilapia or cod (1-2 per taco)
Tortillas
Cilantro Sour Cream (for the recipe, click here)
Tomato, avocado, cilantro & lime, chopped for garnish

Preheat the oven and bake the fish sticks according to the package's instructions.

Meanwhile, light the flame or electric burner on your stove and using tongs, toss the tortillas over the heat, allowing them to char slightly. 

Once the fish is cooked, place a fillet in each tortilla.  Top with tomatoes, avocado, sour cream and cilantro.  Spramp with fresh lime and enjoy.


Wednesday, June 5, 2013

5 Drinks to Spring You Into Summer!

Hello world!  It's been ages since my last post.  I apologize.  I hope you've been cooking and eating wondrously since we last spoke.  My busy life has gotten the better of me lately, but I'm back and ready to share some more approachable, impressive and delicious recipes!

Since summer has just started, I thought a series of refreshing drink recipes would be a good way to enjoy the new season.  In my opinion, everyone should be armed with several go-to beverages for their summer parties.  These recipes are simple, easy to personalize and thirst-quenching.  Happy drinking!


5.  Basil Bloody Mary

Bloody Mary’s are a staple at any worthwhile brunch.  They are a classic that rarely get enough attention, let alone a makeover.  Now, I know everyone makes them differently.  In fact, I know people who throw Bloody Mary parties with a bar-ful of ingredients, flavors and accoutrements.  To me, the Bloody Mary should be simple, fresh and crisp.  To achieve this, I employ basil ice cubes.  New, unique and unexpected, this Basil Bloody Mary will make you reconsider any reservations about tomato juice.  


Basil Bloody Mary 

1 C. Tomato Juice (I prefer the spicy kind)
1 Basil Ice Cube (recipe follows)
½ T. Worcestershire Sauce
1 Shot of Vodka
Squeeze of lemon juice
Pepper, if desired
Basil, celery & lemon for garnish

In a blender, combine tomato juice, basil ice cube, Worcestershire and lemon juice.  Pulse to combine.  Add the shot of vodka and season to taste.  Pour into a tall glass and garnish with fresh basil, celery and lemon.  Enjoy.


Basil Ice Cubes

Unique.  Flavorful.  And yeah, a little badass.  Give these basil ice cubes a try.  They're perfect blended into tea or juice, as a surprising garnish in H2O or as the new chill factor for your vodka.


2 lbs. Basil leaves, cleaned
Water

Place the cleaned basil leaves in a large bowl of cool water.  The water helps provide more juice than the basil leaves would give by themselves.

Put the basil through a juicer, a handful at a time.  I juice the basil twice because I find that not all the juice comes out the first time.  Add water along with the basil as needed.

Immediately pour the basil juice into ice cube trays and set in the freezer.  Check back later this week for new recipes and ideas for Basil Ice Cubes!


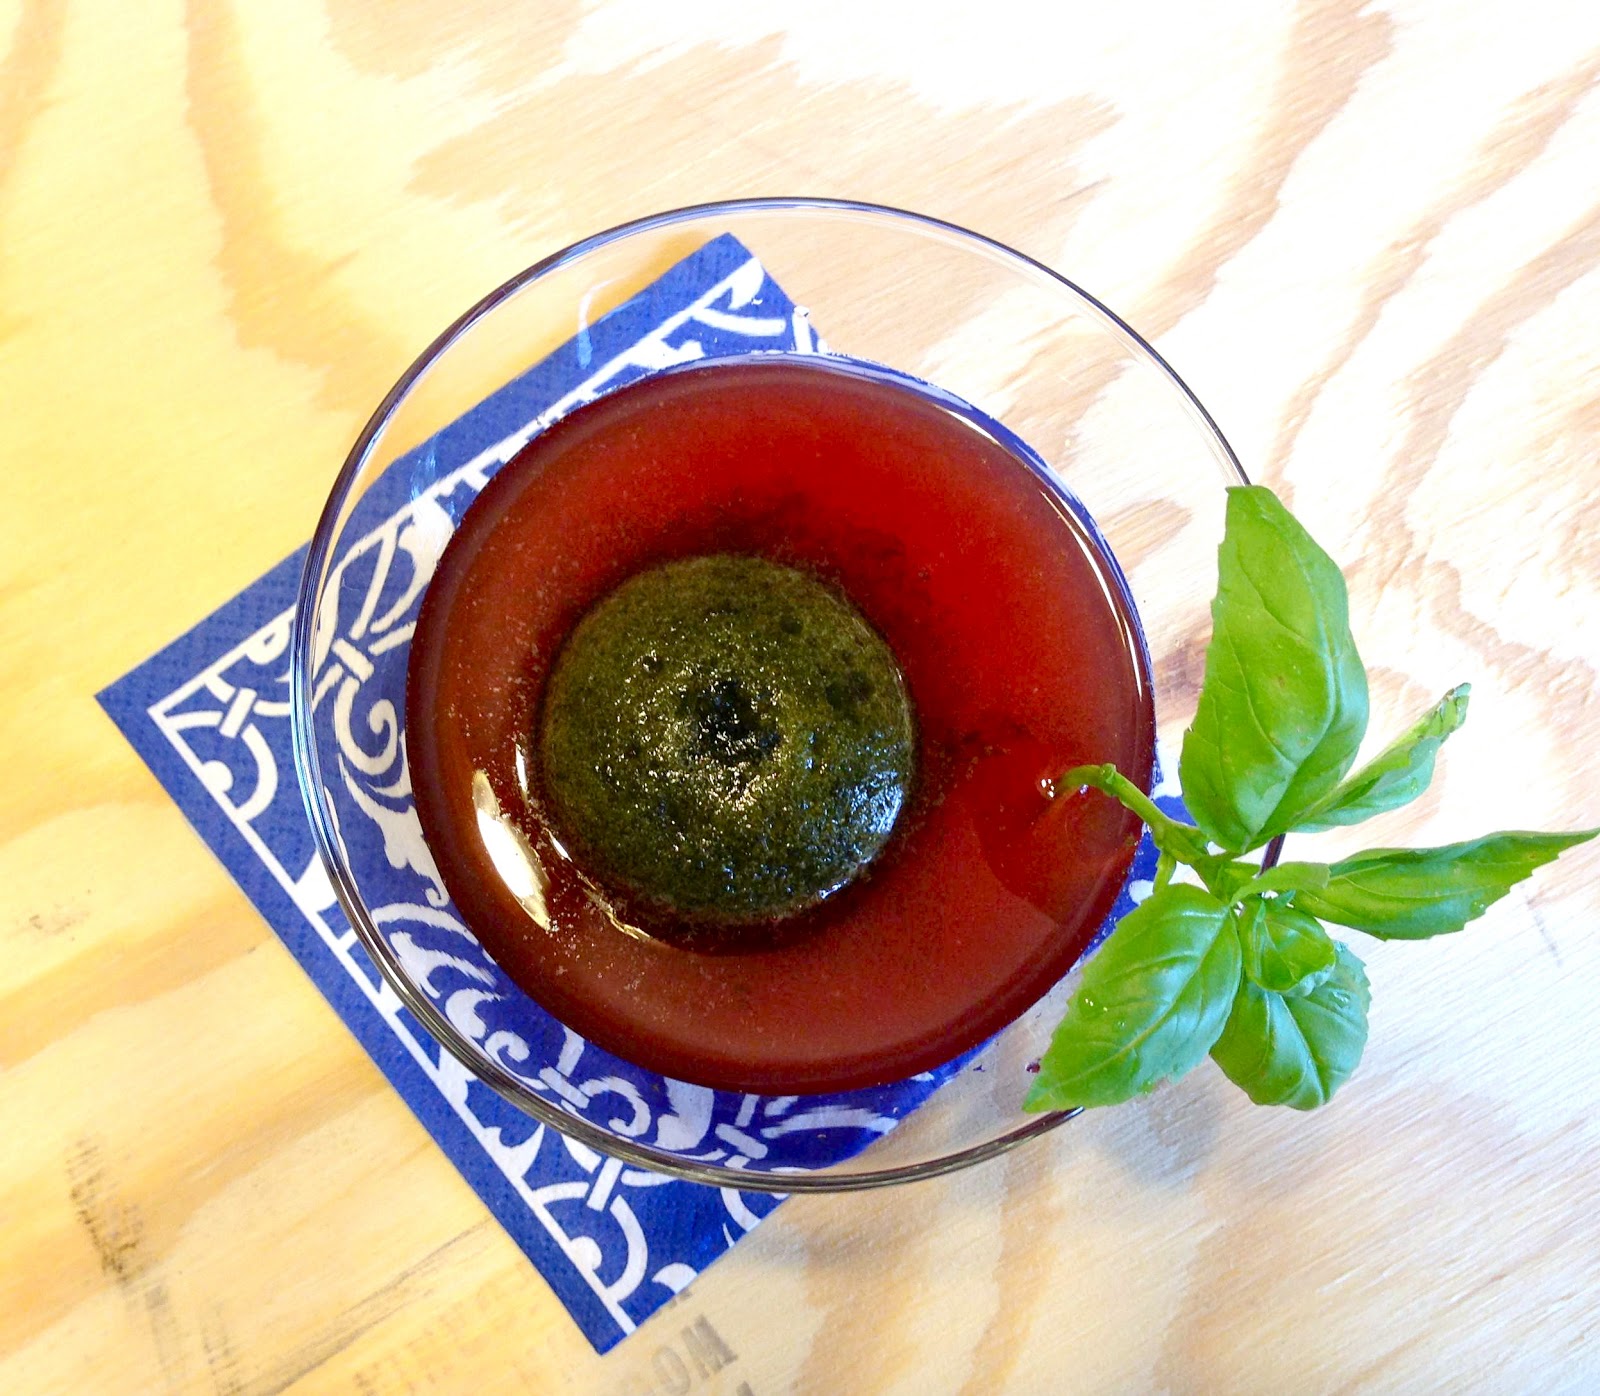
4.  Blue Basil Vodka

Continuing with my rant on basil ice cubes, here’s another drink that highlights their unusual crisp, fresh flavor.  I actually made this drink a year ago and it was a total flop.  I blended blueberries and basil in a food processor and then froze them.  The mixture didn’t come out of the ice trays and when you took a sip, you had to chew the small pieces of berries and herbs.  Needless to say, it was a disaster.  So, this new version has been perfected and it’s impressive, if I do say so myself.  Pair the basil ice cubes with premium vodka and fresh blueberry juice for a provocative summer-inspired beverage.


Blue Basil Vodka

3 oz. Blueberry Juice
1 oz. Vodka (I use Finlandia)
1 Basil Ice Cubes

Combine the blueberry juice and vodka (shaken, never stirred) and pour into a martini glass.  Gently add the basil ice cube on top.  As the basil cube begins to melt, the drink changes its flavor and color subtly.  


3.  White Chocolate Milk
In this mix of heavy hitting summer drinks, I felt that we needed some whimsy.  So, take a break from your overwhelming everyday and regress to a simpler time with a cool glass of white chocolate milk, littered with coffee ice cubes.  


4 t. white cocoa powder or melted white chocolate
2 C. Whole Milk
Coffee Ice Cubes (a pot of cooled coffee frozen in ice cube trays)

Fill a glass with coffee ice cubes.  In a measuring cup, stir the drinking chocolate into the whole milk.  Pour the chocolate milk on top of the coffee ice cubes and give it a stir.  Revel in sweet, delicious simplicity.


2.  Coconut Thai Iced Tea


Everyone loves Thai Iced Tea.  I’ve posted about it before and I’ll post about it again.  It’s such an exotic take on an afternoon tea (or latte, for that matter).  Why not take it to the next level?  Add some coconut to your next Thai iced tea for something truly remarkable.  Thanks to my friend Kye who gave me some fantastic suggestions on Thai tea leaves!


Coconut Thai Iced Tea

2 C. Water
1/4 C. Thai Tea leaves
1/4 C. Sugar
2 C. Half & Half
Coconut Milk Iced Cubes (frozen coconut milk in ice cube trays)

Tip:  Don’t let the leaves steep in hot water for more than a few minutes or your tea will be bitter.  Thanks, Kye!

Fill a tall glass with lots of coconut ice cubes.  Pour the cold Thai tea over the ice, almost all the way to the top.  Gently pour a splash of half and half on top and let it cloud down.  


1.  Raspberry Rosemary Blended Iced Tea

Last, but not least.  My dear Kateryna introduced me to an amazing Brazilian Iced Tea during our visit in New Hampshire earlier this spring.  I was hooked after the first sip I took and I felt so inspired by its unique flavors that I had to experiment with them at home.  This recipe is my spin on the outstanding concoction from Pao Cafe. My Blended Iced Tea with Rosemary and Raspberry is sweet, frothy and herbaceous and a brilliant new thirst-quenching delight.


Raspberry & Rosemary Blended Iced Tea

2 C. Hibiscus Tea, chilled
The juice of ½ a lemon
1/3 C. frozen raspberries
2-3 T. Rosemary Simple Syrup (recipe follows)

In a blender, combine the hibiscus tea, lemon juice, frozen raspberries and simple syrup.  Pour into a chilled glass and escape. 


Rosemary Simple Syrup

1 C. Water
1 C. Sugar
5 Rosemary Sprigs, finely chopped

In a small saucepan, heat the water, sugar and rosemary over medium heat.  Stir gently until the sugar dissolves.  Remove from the heat and cool.  Strain the mixture and discard the rosemary.  


Tuesday, February 12, 2013

Lemon Raspberry Bars


Wish your sweetie a ‘Happy Valentine’s Day’ with these sweet and sumptuous lemon raspberry and blackberry bars.


Lemon Raspberry Bars

1 C. butter, at room temperature
½ C. powdered sugar
2 C. flour
¼ t. salt

Zest of 2 lemons
2 C. sugar
6 T. fresh lemon juice
1 t. vanilla
6 T. flour
1 t. baking powder
4 Eggs
About 24 raspberries (or your favorite berry)
Powdered sugar, for dusting

Preheat the oven to 350.  Generously spray a 9” x 13” baking dish with non-stick spray. 

In a large bowl, cream together the butter and powdered sugar with a mixer.  When it is light and fluffy, add the flour a little at a time, mixing well between each addition.  Add the salt and mix until combined.  With your hands, press this mixture into the baking dish evenly.  Bake for 10 minutes.  Remove from the oven and set aside.


Meanwhile, in a large bowl, combine the sugar and the lemon zest.  Rub the zest and the sugar between your thumb and fingers to release all of the oils and to flavor the sugar.  (*You could save this lemon sugar in an airtight container for other uses if you’d like).   Add the lemon juice, vanilla, flour and baking powder to the lemon sugar and beat with a mixer.  Add the eggs, 1 at a time and mix thoroughly. 

Pour the egg mixture over the baked crust.  It should level out by itself, but you may need to use a spatula and push it around so it is even.  Carefully place the raspberries into the lemon filling, spreading them out so that the whole mixture is dotted with red. 

Cover loosely with aluminum foil and place back in the oven and bake for 20 minutes.  Remove the aluminum foil and bake for another 10-12 minutes.  Your lemon bars are ready when the filling has set and the top is lightly browned.  Cut into your favorite shape, making sure to include raspberries in each one.  Dust with powdered sugar.  Serve with extra berries.


This recipe is loosely adapted from:  http://www.twopeasandtheirpod.com/lemon-bars-recipe/