Showing posts with label meal. Show all posts

Saturday, August 8, 2015

Breakfast Tacos

Despite it being the most important meal of the day, I rarely get hungry early enough to enjoy breakfast.  Except, that is, on the weekends.  I love waking up lazily, when my body has rested of its own accord.  I'll boil some water on the stove (we don't have a microwave in the new apartment), grind some coffee beans and brew a cup of joe before heading out to our balcony.  It's truly the perfect way to greet the day.

In contrast to my tardy appetite, moments after Christian wakes up, he's ready for breakfast.  So, once that coffee has trickled through my veins, we pillage the fridge for eggs, breakfast meat and whatever else we can whip into a worthy meal.  Breakfast tacos have been a recent favorite.  Quick, versatile and flavorful, these breakfast tacos are a great way to transform those last bits of ingredients in the fridge into a simple, delicious meal.


Breakfast Tacos

The Tacos:
4 Small, White Corn Tortillas
1/4 lb. Spicy Breakfast Sausage
4 Eggs
1/4 C. Chihuahua or Feta Cheese
Crema (Recipe Follows)
The Green (Parsley or Cilantro)

Heat a non-stick skillet over medium heat.  Cook the breakfast sausage, breaking it into small crumbles until it's brown and crispy and cooked through.  Remove from the pan and drain on a paper towel.

Over an open flame, carefully heat your tortillas to give them that authentic char.  Flip with tongs so both sides brown.  If you don't have a gas range, just warm them up so they're pliable and don't crack when you fold them.

Cook your eggs any way you like.  I like mine over-medium.

To assemble your tacos, place an egg on each tortilla.  Sprinkle with the crumbled sausage.  Spoon the crema over each taco.  Top with cheese and the green.  Serve with rice.


The Crema:
1/4 C. Sour Cream
1/4 C. Tomatillo Salsa
The Green (Parsley or Cilantro)

For the crema, blend together the sour cream, salsa and the green.


Tuesday, February 17, 2015

Roasted Corn Pancakes with Bourbon Pulled Pork & Slaw

Dear fellow foodies, please help me in celebrating Natural Sugar's 100th post!  On such a special occasion, I thought I'd share a recipe with you that brings back one of my best memories from 2014.  Back in September, Christian and I threw a little dinner party.  It was meant to be a quiet dinner for 6 of our close friends.  It bloomed into a dinner extravaganza of 14 to celebrate the end of summer.  It.  was.  fantastic.  Great company combined with delicious food and wine plus wonderful conversation made it a total success.  


Today's recipe is the entree we served at our party:  Roasted Corn Pancakes with Bourbon Pulled Pork, Fresh Veggie Slaw and Spiced Popcorn.  It's a mouthful, literally.  It has several components and takes some time, but I promise you it's worth it!  This dish is whimsical, satiating and full of robust, fresh flavors.  The Roasted Corn Pancakes are soft and savory, the perfect pillow to catch the drippings of the sweet and smokey Bourbon Pulled Pork.  The Fresh Veggie Slaw adds bright flavors and the Spiced Popcorn finishes the dish off with a fun crunch.  Give it a try on a day when you've got time to spend in the kitchen.  You won't be disappointed.  

Roasted Corn Pancakes

1 C. Fresh corn, off the cobb (or frozen)
Olive Oil
S&P
Your favorite pancake batter
Butter

Preheat the oven to broil.  Spread out the corn onto a cookie sheet.  Drizzle with olive oil.  Sprinkle with S&P.  Toss to coat.  Broil until corn is golden brown.  

Fold the roasted corn and S&P into the pancake batter.  

Melt butter in a skillet over medium heat.  Ladle a spoonful of the pancake batter into the skillet.  Cook the pancake until bubbles form or until the bottom turns golden brown, about 2 minutes.  Flip and cook until the other side is golden, about 1 more minute.  Remove from heat.  Repeat with all pancakes.  

Bourbon Pulled Pork

1 lb. Pork Tenderloin (flavored is fine - go for teriyaki or garlic)
Olive Oil
1/2 Red Onion, sliced
1/2 C. Bourbon, divided (I like Bulleit)
Scant 1/4 C. Brown Sugar
S&P

Heat a medium skillet over high heat.  Drizzle olive oil.  When it glistens and the pan is very hot, add the pork tenderloin.  Sear on all sides.  Transfer to a slow cooker.  Add onions to the skillet with about 1/8 C. of the bourbon.  Cook for 3 minutes.  Transfer the onions and bourbon juice into the slow cooker.  Add the remaining bourbon, brown sugar and S&P.  Cook on low for 5-6 hours, or until the pork is cooked through and pulls apart easily with a fork.  Do not overcook.

Fresh Veggie Slaw

1/2 Yellow Pepper
1/2 Red Pepper
1/2 Red Onion
1 C. Fresh Corn
Cilantro, chopped
S&P
1 T. Vinegar (optional)

Thinly slice the peppers and onion and transfer to a medium bowl.  Add the corn and cilantro, S&P and vinegar.  Toss to combine.  

Spiced Popcorn

1 C. Popped Popcorn
Sprinkle of paprika
Sprinkle of cinnamon

To serve, top the roasted corn pancakes with bourbon pulled pork, fresh slaw and popcorn.  

Corn Three Ways:  Roasted, Fresh & Popped

Deepest apologies for such a long delay since my last post.  Since August, my life has completely filled up!  Huge back-to-back work projects + wonderful boyfriend + weekends chock full of fun = no time to talk about and take good pictures of food.  These great pieces of life continue still, but it's about time I jumped back into talking about, eating and photographing one of my favorite things:  FOOD!


Monday, October 21, 2013

Honey Butter Pork Tenderloin

Last weekend, my parents visited me in Columbus for the first time and we had an absolute blast!  I was able to show them all around my new city and introduce them to the my closest friends.  All in all, it was a fabulous weekend.  And because we're O'Gara's, you can rest assured that our entire weekend revolved around food!  We shared appetizers and cocktails at Hubbard Grill and swooned over sinful desserts at Pistacia Vera.  I also took my parents on a tour of North Market where we found perfumed honey from a local beekeeper, which became the inspiration for our Sunday Family Dinner.


We made a fantastic (if we do say so ourselves) pork tenderloin that we ate with oven roasted potatoes, onion and fennel, as well as a fun, cheesy pull-apart bread.  Our pork tenderloin turned out so well, I figured it just had to be the next blog post.  This Honey Butter Pork Tenderloin is juicy and flavorful with a crisp, sweet crust that is perfect for a special Sunday dinner.

Honey Butter Pork Tenderloin

2 small pork tenderloins
Salt & Pepper
3 T. Cinnamon honey (or another flavored, local honey)
1/2 C. Butter
1/4 Onion, thinly sliced
1 T. Fresh thyme, chopped

Preheat the oven to 400.

Rub the pork tenderloin with salt and pepper so they are evenly and fully coated.

In a large non-stick skillet, melt the butter and honey over medium high heat.  Stir constantly until the honey and butter come together in a quick bubble.  Carefully place the pork tenderloin into the honey butter mixture.  Allow the pork to sit for about a minute without turning it so that it gets a good sear.  Turn and repeat until all of the pork has a crisp, dark crust.

Remove the meat from the skillet and place in an oven safe baking dish.  Add the onion to the honey butter sauce and toss until the onions darken, about 2 minutes.  Carefully pour these caramelized onions and sauce on top of the pork tenderloin.  Sprinkle with thyme and place in the oven.

Bake for 15 minutes or until the pork is cooked all the way through.  Remove the pork from the oven and allow it to sit for about 5 minutes so all those juices can redistribute.

Slice the pork on a diagonal (it looks nicer) and serve with oven-roasted vegetables.


*Local honey contains local pollen and can be helpful in warding off seasonal allergies.  Plus, you get to support a local farmer instead of a grocery conglomerate!  Check out Brad's Bees at https://www.facebook.com/BradsBees.


Sunday, September 8, 2013

Apple Cider Pork Chops

It's September in Ohio.  And you know what that means, don't you?  Apple season!  Get. Excited. 

Another kitchen mishap gave birth to this scrumptious fall meal and incredible sauce.  My original plan was to make pork chops topped with garlic cream cheese and onions.  After removing the onions from the skillet, the brown bits began to burn, so I tossed my nearby glass of apple cider right in.  Once it hit the pan, it dawned on me:  apple cider glaze.  I let the juice reduce and took it one step further.  I mixed in my garlic cream cheese and a classic was born. 


This dish is sweet and packed with autumn flavor.  The pork chops are moist and juicy, the onions slightly sweet with a perfect crunch and the sauce is creamy and delightful.  Serve them with potatoes and something green for the ultimate impressive dinner. 

Apple Cider Pork Chops

4 pork chops
4 oz. garlic cream cheese at room temperature, recipe follows
Salt and pepper
Olive oil
1 yellow onion, chopped into thin petals
1 ½ - 2 C. dark and cloudy Apple Cider
Chives or Parsley, to garnish

Season the pork chops with salt and pepper and drizzle with olive oil.  Cover and set them in the fridge to marinate for at least 30 minutes.  Bring to room temperature before cooking.

Preheat the oven to 350.

*If you'd rather not use your oven in addition to the stove, follow the instructions at the bottom of this recipe.

Heat a medium skillet with 2 T. olive oil over high heat.  When the oil is hot, add the pork chops and sear for 3-4 minutes per side.  When the pork has a delicious brown edge, remove it and place in an oven safe dish covered with aluminum foil.  Set in the oven to continue cooking for about 10 minutes.  

In the skillet, add 1 T. more olive oil and add the onions.  Cook them over medium until they have caramelized.  They do not need to be dark, just caramel colored.  Remove them from the skillet and set aside. 

Add 1 C. of apple cider to the pan to deglaze, pulling up all the brown bits with your wooden spoon.  Boil the apple cider until it reduces by one half.  Add the cream cheese mixture and whisk it into the apple cider.  It will be clumpy at first.  DON’T WORRY!  Just keep whisking until a smooth and glossy sauce appears.  It will work!  Add more apple cider if the sauce becomes too thick. 

To plate, place the cooked pork chop down and top with caramelized onions.  Drizzle the sauce on top and around the pork chop.  Garnish with something green, for looks. I used green onions as garnish and I served these pork chops with Horseradish Potatoes Au Gratin.  Recipe coming soon!


*To complete this recipe without using the oven, when you remove the pork chops from the skillet, allow them to rest on a plate and cover them with foil.  After you've whisked your sauce into submission, nestle the pork chops into the sauce and allow them to cook over medium low heat for about 10 minutes, or until the pork chops are thoroughly cooked.  You can even add the onions back into the pan, if you prefer.  

Garlic Cream Cheese

3 garlic cloves
4 oz. cream cheese, at room temperature

Thoroughly combine in a small bowl and refrigerate overnight to allow the flavors to marry. 

**This can also be used as a dip for vegetables or a spread for toasted bread.  Add some thyme or dill for extra flavor and freshness!


Friday, January 25, 2013

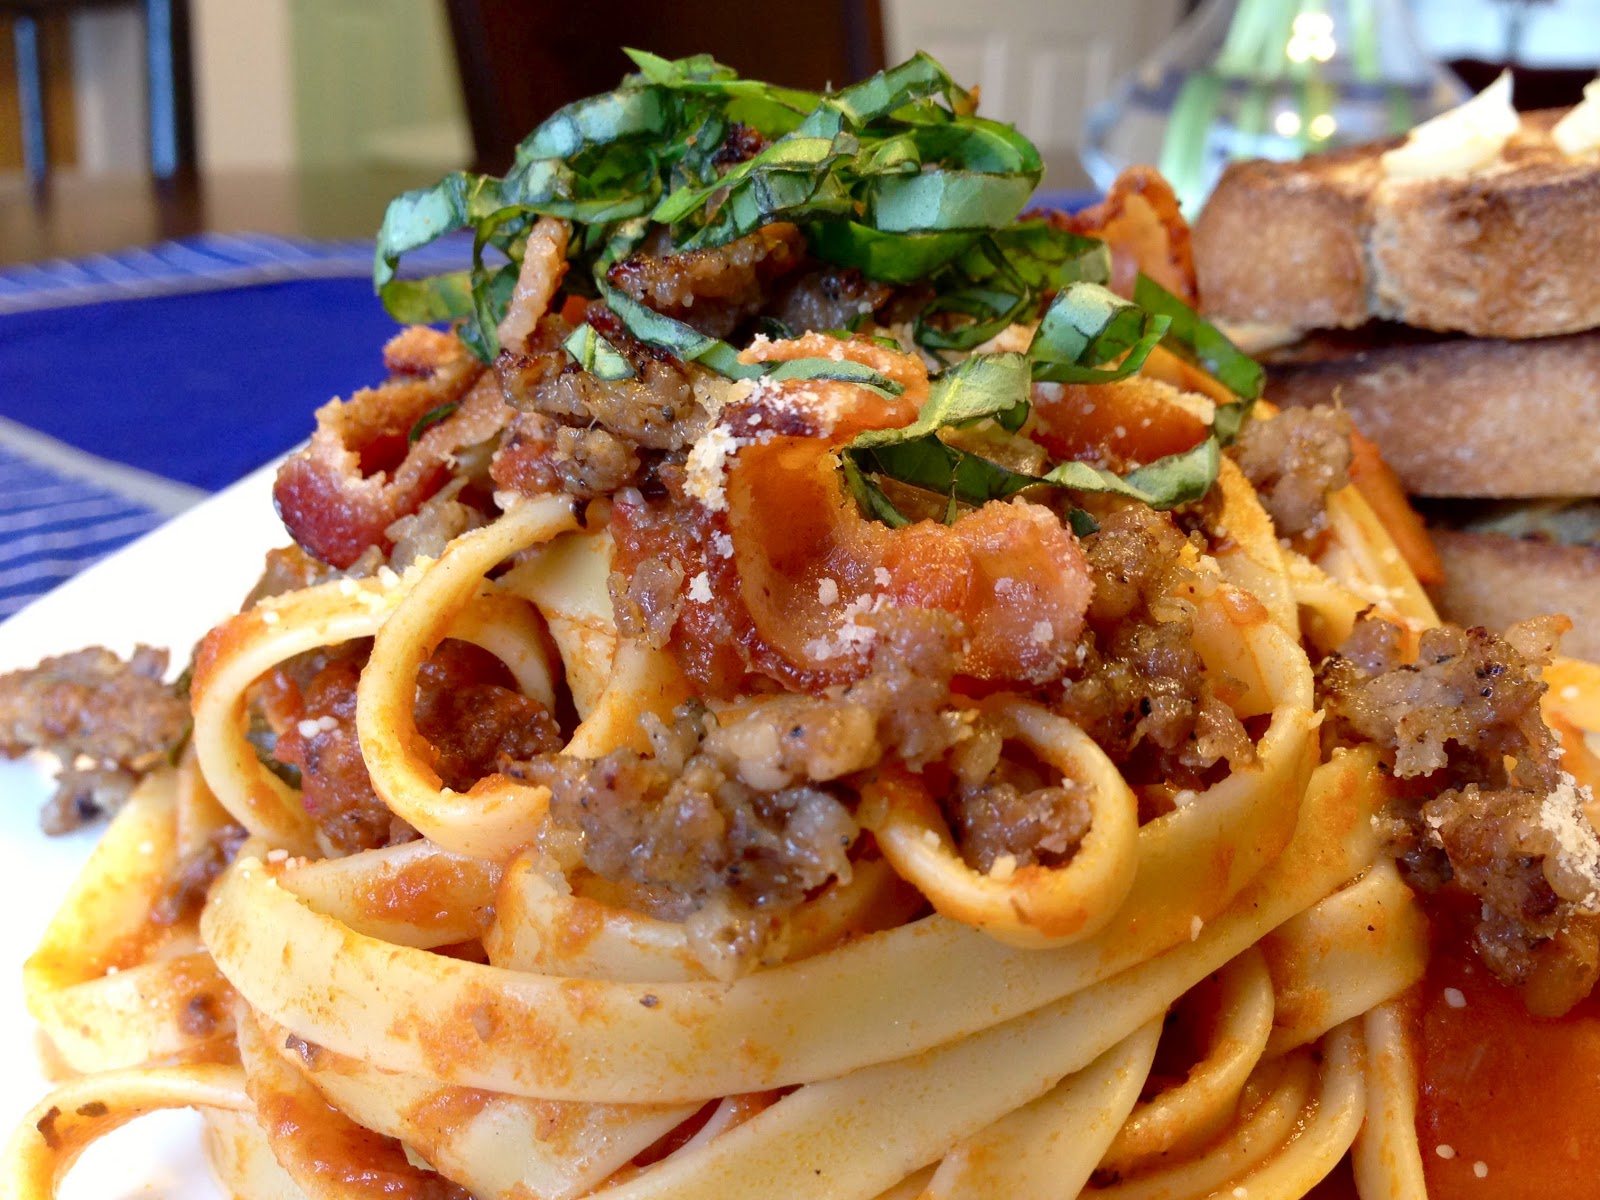
Pasta Rossa


I have a thing about spaghetti noodles.  I don’t like them.  There’s something about the shape and the way it doesn’t hold sauce that distracts me.  Ridiculous, I know.  But I like to pay attention to that kind of thing.  It’s the perfectionist in me that I can’t seem to suppress.  The way I see it, why not make a simple change, like the type of pasta, and arrive at a result that much closer to perfection?  No distractions.  Just pleasant-looking, sauce absorbing, delicious, reassuring pasta. 


With that said, I LOVE ‘spaghetti sauce!’  This recipe really is closer to a Bolognese, so, I’ve renamed it Red Pasta for the sake of simplicity.  But by George, feel free to use whatever your favorite shape and size of pasta is and call it whatever the hell you want!

This red pasta sauce is thick and sumptuous, packed with veggies and meat and deep, rich flavor. 


Good to know:

Marinara Sauce – a simple, tomato-based sauce with basil and garlic.
Spaghetti Sauce – an “Americanism” for a basic red pasta sauce normally served with spaghetti pasta. 
Bolognese – a tomato and meat sauce made with onion, carrots, celery, beef & pork. 
Puttanesca – a tomato sauce with anchovies, chili flakes, olives and capers, named after ‘women of the night.’

4 slices of bacon
1 lb. of ground Italian sausage
1 onion, diced
4 medium-sized carrots, diced
4 ribs of celery, diced
4 cloves of garlic, minced
1 C. of your favorite red wine
1 jar of pasta sauce (like garlic & onion OR use several Tablespoons of tomato paste)
1 28 oz. can of tomatoes
Salt & Pepper, to taste

Basil, julienned (thin strips), to garnish
Bacon, crumbled to garnish
Italian sausage, to garnish
Parmesan, to garnish

Your favorite pasta, cooked al dente


In a large pot, cook the bacon over medium-low heat.  By cooking over low heat, you will render all that fat from the bacon, which will help give this sauce even more depth.  Remove the bacon when it’s chewy and cooked through.

Add the Italian sausage to the bacon grease and cook over medium heat, stirring the meat to break it into pieces.  When it has turned brown, remove the sausage and set in a bowl to rest.  Add the diced onion, carrots and celery to the bacon and sausage grease.  Cook this trinity of vegetables (called mire-poix in French, pronounced “meer-pwa”) over medium heat, stirring occasionally.  You want them to turn translucent and start to brown.  Do not let them burn.  Add the garlic and stir to mix it into the veggies.  Cook until it’s fragrant – less than a minute. 

Add the wine to the veggies and bring the mixture to a boil.  Turn down the heat slightly and let the mixture simmer until the wine has reduced and thickened and coats the veggies, about 7 minutes.  *As Ina says, choose a wine that you would actually drink.  If you don’t, then you wont want to eat it either.  If you absolutely HATE red wine, choose a bold white wine like Chardonnay.  It will stand up to the strong meat flavors.  Really, you’re just looking for depth of flavor. 

Once the wine has reduced, add the canned tomatoes and the pasta sauce.  Add the Italian sausage back to the pot as well, reserving just enough to garnish at the end.  Stir to combine and turn the heat to low.  Let this sauce cook for about 30 minutes to all day long.  The longer it cooks, the better it tastes.  If it starts to get too thick, just add a bit of water.  Taste it along the way as well and season with salt and pepper, if needed. 

When you’re ready to eat, cook your pasta to al dente.  This just means that it’s still got a bite to it so it’s not mushy and saturated with water.  You know, like those awful noodles you find in cans of chicken noodle soup! 

I like to drain my noodles thoroughly and then add them right to the sauce.   This way each and every bite of pasta gets coated by sauce.  To garnish, sprinkle with the reserved Italian sausage and bacon, Parmesan cheese and basil.  Serve with garlic bread. 

Squisita!  

*This makes a ton of pasta sauce, so eat some and store the rest in the freezer for later.  


 Like this red pasta?  Try this white one too:


Friday, January 11, 2013

BLT's with Basil Mayo

 Sometimes, I find there’s nothing quite as sating as a BLT.  

Bacon.  Who can resist that?  Warm, crunchy and chewy freshly baked bread.  Yes, please!  Lettuce and tomato.  Okay, fresh crisp veggies never hurt anyone!  I was craving this perfect combination of ingredients a few days ago and thought I’d make an herb mayo to compliment all the flavors.  Basil just seemed to fit perfectly.  Slightly sweet and incredibly aromatic, this mayo will give your BLT’s (or any other sandwich for that matter) the extra ummmmmmph that we all need from time to time. 


4 slices of cooked bacon (I like chewy bacon for these BLT’s versus crunchy)
1 tomato, sliced thinly
Iceberg lettuce, torn
2 slices of fresh Sourdough bread
Basil Mayo (recipe follows)

Lay out the ingredients, so it’s easy to assemble your sandwich. 

Toast the Sourdough bread in a toaster or under the broiler.  Spread a healthy* tablespoon of basil mayo on each slice of bread.  Lay a couple leaves of lettuce on top and then put the tomato.  I never put the tomato right on the bread because it gets soggy.  Top it off with the chewy bacon and place the other slice of bread right on top.  Press down gently and cut the sandwich on the bias.  Perfection.  

*Healthy = oversized and proud of it


Basil Mayo

Sweet, in a licorice kind of way, Smooth & Aromatic.  Yumm. 


¾ C. Mayo (I use Hellmann’s)
¼ C. Basil, finely chopped
Salt & Pepper, to taste

This couldn’t be any easier!  In a small bowl, mix the mayo and basil together.  Season it with salt and pepper until it tastes delicious.  Cover and refrigerate for a couple hours so the basil can infiltrate the mayo.  Serve on toast or sandwiches or use as a dip for French fries!