Friday, December 6, 2013

Honduran Holiday Pork


This recipe is inspired by a traditional holiday meal served in Honduras.  I fell in love with it over dinner with a friend’s family and now I make it every year around the holidays.  This pork is dynamic and robust, with wonderful citrus flavors and smoky spices.  It’s incredibly easy to make and it will fill your home with delectable aromas.


Guide to Latin T Dishes:

Torta - sandwich on soft bread
Tortilla - obvious, but flat bread made from corn or flour
Tostada - crispy tortilla piled high with latin goodies
Taquito - rolled and fried tortilla with meat and cheese
Taco - if I have to explain this one to you, you may be reading the wrong blog

Crockpot Orange Pork

1 Pork Shoulder (one that will fit in your crockpot)
Salt & Pepper
1 T. plus 1 t. Smoked Paprika, divided
1 T. plus 1 t. Cumin, divided
1 T. plus 1 t. Sugar, divided
2 Red Onions, cut into slices
2 Oranges, cut into large chunks
1 Lime, cut into large chunks
¼ C. Olive oil
2 Tablespoons butter
Cilantro, Orange slices & Avocado, for garnish
Tortillas, for serving


Add the pork and onions to a large bowl and sprinkle generously with salt, pepper and the spices.  Squeeze the citrus over the pork and drizzle with the olive oil.  Cover the bowl with plastic and marinate overnight. 

In the morning, squeeze whatever is left from the citrus over the meat and onions.  Remove the citrus from the bowl and discard.  Carefully transfer the pork, onions and marinade from the bowl to a crockpot.  Set to high and cook for 8-9 hours until the pork is cooked through, tender and pulls apart easily with a fork. 

Move the pork to a large bowl and shred with 2 forks.  Skim the fat from the juices in the crockpot and doctor up the sauce with the butter and about one teaspoon of smoked paprika, cumin and sugar.  Season with salt and pepper, to taste.  Add the meat back to the crockpot so it can soak up all those good flavors. 

To serve, pile the pork onto a warm tortilla and garnish with fresh cilantro, orange and avocado. 

Happy holidays and happy eating!


Monday, October 21, 2013

Honey Butter Pork Tenderloin

Last weekend, my parents visited me in Columbus for the first time and we had an absolute blast!  I was able to show them all around my new city and introduce them to the my closest friends.  All in all, it was a fabulous weekend.  And because we're O'Gara's, you can rest assured that our entire weekend revolved around food!  We shared appetizers and cocktails at Hubbard Grill and swooned over sinful desserts at Pistacia Vera.  I also took my parents on a tour of North Market where we found perfumed honey from a local beekeeper, which became the inspiration for our Sunday Family Dinner.


We made a fantastic (if we do say so ourselves) pork tenderloin that we ate with oven roasted potatoes, onion and fennel, as well as a fun, cheesy pull-apart bread.  Our pork tenderloin turned out so well, I figured it just had to be the next blog post.  This Honey Butter Pork Tenderloin is juicy and flavorful with a crisp, sweet crust that is perfect for a special Sunday dinner.

Honey Butter Pork Tenderloin

2 small pork tenderloins
Salt & Pepper
3 T. Cinnamon honey (or another flavored, local honey)
1/2 C. Butter
1/4 Onion, thinly sliced
1 T. Fresh thyme, chopped

Preheat the oven to 400.

Rub the pork tenderloin with salt and pepper so they are evenly and fully coated.

In a large non-stick skillet, melt the butter and honey over medium high heat.  Stir constantly until the honey and butter come together in a quick bubble.  Carefully place the pork tenderloin into the honey butter mixture.  Allow the pork to sit for about a minute without turning it so that it gets a good sear.  Turn and repeat until all of the pork has a crisp, dark crust.

Remove the meat from the skillet and place in an oven safe baking dish.  Add the onion to the honey butter sauce and toss until the onions darken, about 2 minutes.  Carefully pour these caramelized onions and sauce on top of the pork tenderloin.  Sprinkle with thyme and place in the oven.

Bake for 15 minutes or until the pork is cooked all the way through.  Remove the pork from the oven and allow it to sit for about 5 minutes so all those juices can redistribute.

Slice the pork on a diagonal (it looks nicer) and serve with oven-roasted vegetables.


*Local honey contains local pollen and can be helpful in warding off seasonal allergies.  Plus, you get to support a local farmer instead of a grocery conglomerate!  Check out Brad's Bees at https://www.facebook.com/BradsBees.


Thursday, October 3, 2013

Apple Cardamom Custard Tart

I'm trying my best to eat seasonally and since we're still knee-deep in apple season in Ohio, I'm stretching my creative muscles for new ways to enjoy these local, delicious apples.  Today, I decided it was time to attempt a flavor combination that's been on my mind for awhile:  apple & cardamom.  Cardamom is an exotic spice with East Indian roots that I absolutely adore.  It's warm and fragrant and pairs quite well with something sweet like fruit.  This Apple Cardamom Custard Tart is silky and sweet, with a subtle hint of spice.


Apple Cardamom Custard Tart

1 Pie crust (homemade or store-bought)
3 Apples, peeled, cored and very thinly sliced
4 Large eggs
1 C. Whole Milk (or heavy cream if you're feeling extra sinful)
2 T. sugar, plus more for sprinkling
1 t. cardamom


Preheat the oven to 400.

Lay out your pie crust in a lightly greased, shallow baking dish.  Using a fork, gently "dock" the entire surface, making holes so that your crust does not get air bubbles.  Place the apple slices around the pie crust in a circular pattern.  I did two layers of apples so that apple slices would stick out slightly from the custard.  

In a medium bowl, combine the eggs, milk, sugar and cardamom.  Beat with a mixer until completely smooth.  Place the pie dish on a cookie sheet.  Carefully pour the custard over the apple slices.  

Gently place the cookie sheet in the oven and bake the custard tart for 10 minutes at 400.  Then, lower the temperature to 350 and bake for an additional 10-15 minutes or until the custard is set.  You want it to be just firm, but not overdone.  In the last 5 minutes of baking, sprinkle 1 T. of sugar on top and let the sugar caramelize for that finished look.  


Sunday, September 22, 2013

Scotch Eggs with Dill Aioli!

I've been wanting to make Scotch Eggs for such a long time!  And now that I'm in a new kitchen, I decided to bite the bullet and give them a try it!  A bizarre construction, Scotch Eggs are hard-boiled eggs, wrapped in sausage and sprinkled with breadcrumbs.  Ironically, they were invented by a store in London in the 1700's as a picnic snack, easily taken on long carriage rides.  But now, they've made it into the inner circles of the culinary world, fluttering their way through gastropubs, the Food Network and even Michelin-starred restaurants.  You have to take a bite of one of these unusual delicacies!


Scotch Eggs 

4 Eggs
H2O, for boiling
1/2 lb. Ground breakfast sausage
1 C. Panko bread crumbs
Vegetable Oil Spray (like Pam)
Dill Aioli (Recipe follows)

I promise these are not furry!  But I guess now I know how to create that effect for Halloween food.

Preheat the oven to 400.

(Thanks www.bonappetit.com for some perfect hardboiled advice). Place the eggs in a small saucepan and cover with cool water.  Set over high heat and bring to a boil.  Put the lid on the pot and turn off the heat.  Let the eggs cook for 3 minutes.  Drain the hot water and run cool water over the eggs.  Set them aside to cool slightly.  When the eggs are cool enough to handle, crack the shells and carefully peel them.

Pour the bread crumbs into a shallow bowl and set aside.

Take a small amount of ground sausage (about 1/8 lb.) Roll it into a ball and then flatten it between your palms until it is less than a 1/4" thick.  Place the hard boiled egg in the middle of the sausage and carefully wrap the sausage around the egg.  It takes a little bit of delicate work, but as long as just about all of the egg is covered, you'll be fine.

Gently roll the sausage-covered egg in the breadcrumbs and place on a baking sheet.  Repeat with each of the eggs.  Lightly spray each egg with a bit of oil to help the breadcrumbs crisp up.

Bake the eggs for about 10 minutes, or until the sausage is brown and fully cooked.  Serve with dill aioli.


Dill Aioli

This is hardly a recipe!  But, it renders fabulous results.  Dill is a strong, yet delicate herb and it lends a fresh lightness to mayonnaise.  This is great as a dip for Scotch Eggs or French Fries or a spread for sandwiches.


Dill Aioli

1/2 C. Mayonnaise (I prefer Hellman's)
2 T. minced fresh dill

Combine and set in the refrigerator so the flavors can marry.


Sunday, September 8, 2013

Apple Cider Pork Chops

It's September in Ohio.  And you know what that means, don't you?  Apple season!  Get. Excited. 

Another kitchen mishap gave birth to this scrumptious fall meal and incredible sauce.  My original plan was to make pork chops topped with garlic cream cheese and onions.  After removing the onions from the skillet, the brown bits began to burn, so I tossed my nearby glass of apple cider right in.  Once it hit the pan, it dawned on me:  apple cider glaze.  I let the juice reduce and took it one step further.  I mixed in my garlic cream cheese and a classic was born. 


This dish is sweet and packed with autumn flavor.  The pork chops are moist and juicy, the onions slightly sweet with a perfect crunch and the sauce is creamy and delightful.  Serve them with potatoes and something green for the ultimate impressive dinner. 

Apple Cider Pork Chops

4 pork chops
4 oz. garlic cream cheese at room temperature, recipe follows
Salt and pepper
Olive oil
1 yellow onion, chopped into thin petals
1 ½ - 2 C. dark and cloudy Apple Cider
Chives or Parsley, to garnish

Season the pork chops with salt and pepper and drizzle with olive oil.  Cover and set them in the fridge to marinate for at least 30 minutes.  Bring to room temperature before cooking.

Preheat the oven to 350.

*If you'd rather not use your oven in addition to the stove, follow the instructions at the bottom of this recipe.

Heat a medium skillet with 2 T. olive oil over high heat.  When the oil is hot, add the pork chops and sear for 3-4 minutes per side.  When the pork has a delicious brown edge, remove it and place in an oven safe dish covered with aluminum foil.  Set in the oven to continue cooking for about 10 minutes.  

In the skillet, add 1 T. more olive oil and add the onions.  Cook them over medium until they have caramelized.  They do not need to be dark, just caramel colored.  Remove them from the skillet and set aside. 

Add 1 C. of apple cider to the pan to deglaze, pulling up all the brown bits with your wooden spoon.  Boil the apple cider until it reduces by one half.  Add the cream cheese mixture and whisk it into the apple cider.  It will be clumpy at first.  DON’T WORRY!  Just keep whisking until a smooth and glossy sauce appears.  It will work!  Add more apple cider if the sauce becomes too thick. 

To plate, place the cooked pork chop down and top with caramelized onions.  Drizzle the sauce on top and around the pork chop.  Garnish with something green, for looks. I used green onions as garnish and I served these pork chops with Horseradish Potatoes Au Gratin.  Recipe coming soon!


*To complete this recipe without using the oven, when you remove the pork chops from the skillet, allow them to rest on a plate and cover them with foil.  After you've whisked your sauce into submission, nestle the pork chops into the sauce and allow them to cook over medium low heat for about 10 minutes, or until the pork chops are thoroughly cooked.  You can even add the onions back into the pan, if you prefer.  

Garlic Cream Cheese

3 garlic cloves
4 oz. cream cheese, at room temperature

Thoroughly combine in a small bowl and refrigerate overnight to allow the flavors to marry. 

**This can also be used as a dip for vegetables or a spread for toasted bread.  Add some thyme or dill for extra flavor and freshness!



Wednesday, August 28, 2013

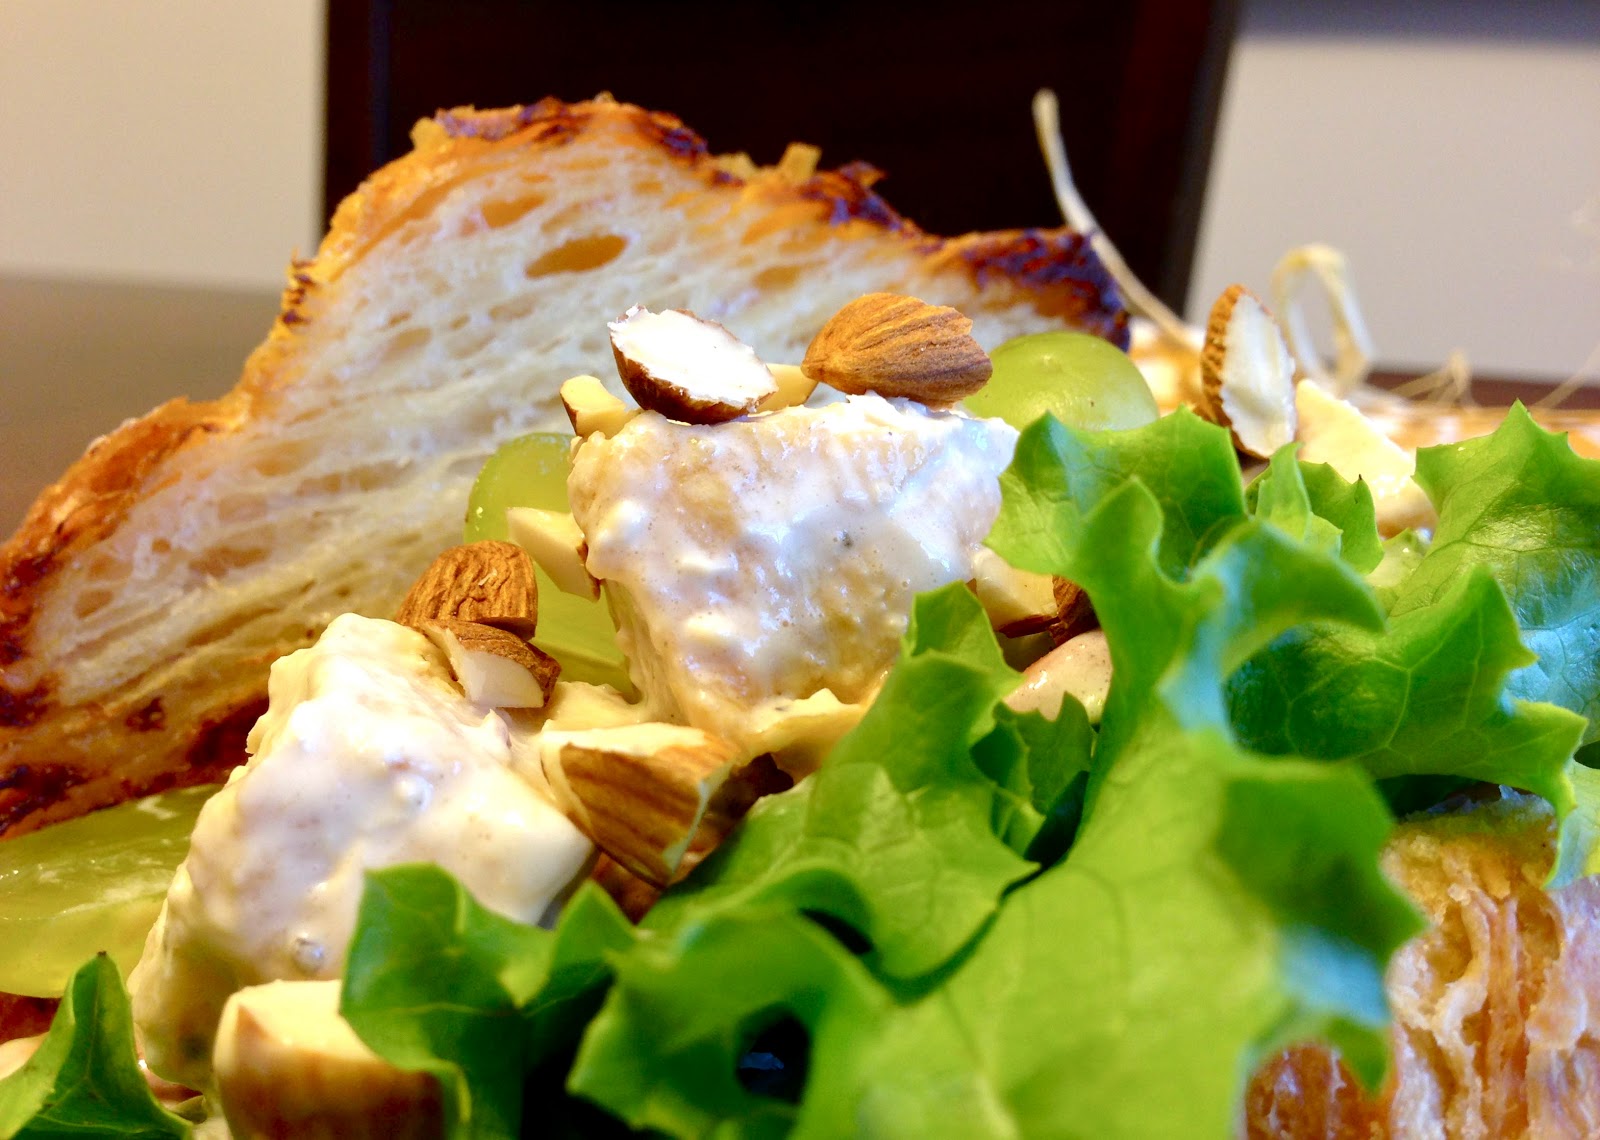
Your New Favorite Chicken Salad

There are about 1.8 million chicken salad recipes out there.  Yes, I checked my facts.  If there are so many, then why do we not crave chicken salad?!  I will admit that normally when I see chicken salad in a restaurant or a grocery store, my mind goes straight to:  dried out pieces of chicken (or worse, canned!) mayo and celery.    Am I right?  Not the best image in our minds or taste in our mouths.  Let's change that.  Try my chicken salad and you'll never go back to that wretched original served kitty corner to tomato aspic.  My chicken salad is packed with fresh, bright flavor and accented with almonds and grapes.  


Chicken Salad

4-6 chicken boobs
Olive oil
Salt & Pepper
½ C. Mayonnaise
The juice of 1 lemon
1 C. grapes, halved
½ C. almonds, chopped

Prepare your chicken boobs by seasoning them with salt and pepper and a drizzle of olive oil.  Allow them to marinate for about 20 minutes. 

In a medium skillet, heat a tablespoon of olive oil over medium heat.  When it’s quite hot, add several of the chicken boobs.  Let them cook for a good 4-6 minutes without moving them.  You want them to get a good golden brown crust.  After they have browned, flip and cook for another 4 minutes on the other side.

When the chicken is fully cooked, remove from the pan and let sit.  Do not cut into them right away or they will dry out.  Repeat with the rest of the chicken.  When the chicken has rested for at least 5 minutes, cut into bite-sized pieces. 

In a large bowl, combine the mayonnaise, lemon juice, salt & pepper.  Wisk until the sauce is smooth.  Add the grapes, almonds and chicken and toss to coat them evenly.  

Chill in the fridge for at least an hour so the flavors can marry.  Serve on toasted croissants.

*TIP:  Many chicken salad recipes call for boiled chicken or canned chicken.  Go a step further and pan-fry it.  The color you get on the chicken adds another layer of flavor that sets this recipe apart.  Rotisserie Chicken would work really well too.


**TIP:  Grapes add a fresh sweetness to this combination.  Experiment with other fruit such as dried apricots or raisins for more sweet texture.  


Sunday, August 18, 2013

Baja Burritos

I love making savory latin dishes with hints of fresh sweetness.  Whether it's a quesadilla with slices of apple or Honduran orange pork, fruit adds a dynamic twist to an everyday favorite.  These burritos are no exception.  Packed with tender chicken, caramelized peppers and onion, highlighted with chunks of sweet pineapple and a BBQ-inspired enchilada sauce, these burritos are spicy and sensual and a welcome summer surprise.  


Baja Sauce:
6 T BBQ sauce
1 Can Red Enchilada sauce
2 T. Worcester sauce
2 t. Cumin
Salt & pepper

Filling:
Onion
Red Pepper
Chicken boobs, in chunks
Pineapple, without juice
1 jalapeño, finely diced, no seeds

Tortillas


Combine the sauce ingredients in a medium saucepan and bring to low simmer.  Season with salt and pepper, to taste. 

Bring a large skillet to medium heat with 1 T. olive oil.  Sprinkle the chicken with salt and pepper and cook until golden.  Remove and set aside.  

In the same skillet, sauté onion, red pepper, jalapeño and pineapple until slightly charred.  Add the chicken and toss to combine. 

Spoon the mixture into the tortillas and roll to make burritos.  I eat them just like this OR fry them lightly for a crunchy edge.  Serve them with the Baja Sauce for dipping. 


Tuesday, June 25, 2013

Fish Tacos

Fish Tacos.  They can be really good or they can be RULL bad.  These ones are the former.  Crunchy, zesty, flavorful, fresh and delicious.  They always take me back to the first fish tacos I had, in Oceanside, CA at a restaurant that jutted out into the sea.  They were fabulous.  This is my easy homemade version that you could effortlessly make on a weeknight.  Feel free to switch up the garnish and make them your own!


Fish Tacos
 
Fish Sticks or fillets of white fish, such as tilapia or cod (1-2 per taco)
Tortillas
Cilantro Sour Cream (for the recipe, click here)
Tomato, avocado, cilantro & lime, chopped for garnish

Preheat the oven and bake the fish sticks according to the package's instructions.

Meanwhile, light the flame or electric burner on your stove and using tongs, toss the tortillas over the heat, allowing them to char slightly. 

Once the fish is cooked, place a fillet in each tortilla.  Top with tomatoes, avocado, sour cream and cilantro.  Spramp with fresh lime and enjoy.


Wednesday, June 5, 2013

5 Drinks to Spring You Into Summer!

Hello world!  It's been ages since my last post.  I apologize.  I hope you've been cooking and eating wondrously since we last spoke.  My busy life has gotten the better of me lately, but I'm back and ready to share some more approachable, impressive and delicious recipes!

Since summer has just started, I thought a series of refreshing drink recipes would be a good way to enjoy the new season.  In my opinion, everyone should be armed with several go-to beverages for their summer parties.  These recipes are simple, easy to personalize and thirst-quenching.  Happy drinking!


5.  Basil Bloody Mary

Bloody Mary’s are a staple at any worthwhile brunch.  They are a classic that rarely get enough attention, let alone a makeover.  Now, I know everyone makes them differently.  In fact, I know people who throw Bloody Mary parties with a bar-ful of ingredients, flavors and accoutrements.  To me, the Bloody Mary should be simple, fresh and crisp.  To achieve this, I employ basil ice cubes.  New, unique and unexpected, this Basil Bloody Mary will make you reconsider any reservations about tomato juice.  


Basil Bloody Mary 

1 C. Tomato Juice (I prefer the spicy kind)
1 Basil Ice Cube (recipe follows)
½ T. Worcestershire Sauce
1 Shot of Vodka
Squeeze of lemon juice
Pepper, if desired
Basil, celery & lemon for garnish

In a blender, combine tomato juice, basil ice cube, Worcestershire and lemon juice.  Pulse to combine.  Add the shot of vodka and season to taste.  Pour into a tall glass and garnish with fresh basil, celery and lemon.  Enjoy.


Basil Ice Cubes

Unique.  Flavorful.  And yeah, a little badass.  Give these basil ice cubes a try.  They're perfect blended into tea or juice, as a surprising garnish in H2O or as the new chill factor for your vodka.


2 lbs. Basil leaves, cleaned
Water

Place the cleaned basil leaves in a large bowl of cool water.  The water helps provide more juice than the basil leaves would give by themselves.

Put the basil through a juicer, a handful at a time.  I juice the basil twice because I find that not all the juice comes out the first time.  Add water along with the basil as needed.

Immediately pour the basil juice into ice cube trays and set in the freezer.  Check back later this week for new recipes and ideas for Basil Ice Cubes!


4.  Blue Basil Vodka

Continuing with my rant on basil ice cubes, here’s another drink that highlights their unusual crisp, fresh flavor.  I actually made this drink a year ago and it was a total flop.  I blended blueberries and basil in a food processor and then froze them.  The mixture didn’t come out of the ice trays and when you took a sip, you had to chew the small pieces of berries and herbs.  Needless to say, it was a disaster.  So, this new version has been perfected and it’s impressive, if I do say so myself.  Pair the basil ice cubes with premium vodka and fresh blueberry juice for a provocative summer-inspired beverage.


Blue Basil Vodka

3 oz. Blueberry Juice
1 oz. Vodka (I use Finlandia)
1 Basil Ice Cubes

Combine the blueberry juice and vodka (shaken, never stirred) and pour into a martini glass.  Gently add the basil ice cube on top.  As the basil cube begins to melt, the drink changes its flavor and color subtly.  


3.  White Chocolate Milk
In this mix of heavy hitting summer drinks, I felt that we needed some whimsy.  So, take a break from your overwhelming everyday and regress to a simpler time with a cool glass of white chocolate milk, littered with coffee ice cubes.  


4 t. white cocoa powder or melted white chocolate
2 C. Whole Milk
Coffee Ice Cubes (a pot of cooled coffee frozen in ice cube trays)

Fill a glass with coffee ice cubes.  In a measuring cup, stir the drinking chocolate into the whole milk.  Pour the chocolate milk on top of the coffee ice cubes and give it a stir.  Revel in sweet, delicious simplicity.


2.  Coconut Thai Iced Tea


Everyone loves Thai Iced Tea.  I’ve posted about it before and I’ll post about it again.  It’s such an exotic take on an afternoon tea (or latte, for that matter).  Why not take it to the next level?  Add some coconut to your next Thai iced tea for something truly remarkable.  Thanks to my friend Kye who gave me some fantastic suggestions on Thai tea leaves!


Coconut Thai Iced Tea

2 C. Water
1/4 C. Thai Tea leaves
1/4 C. Sugar
2 C. Half & Half
Coconut Milk Iced Cubes (frozen coconut milk in ice cube trays)

Tip:  Don’t let the leaves steep in hot water for more than a few minutes or your tea will be bitter.  Thanks, Kye!

Fill a tall glass with lots of coconut ice cubes.  Pour the cold Thai tea over the ice, almost all the way to the top.  Gently pour a splash of half and half on top and let it cloud down.  


1.  Raspberry Rosemary Blended Iced Tea

Last, but not least.  My dear Kateryna introduced me to an amazing Brazilian Iced Tea during our visit in New Hampshire earlier this spring.  I was hooked after the first sip I took and I felt so inspired by its unique flavors that I had to experiment with them at home.  This recipe is my spin on the outstanding concoction from Pao Cafe. My Blended Iced Tea with Rosemary and Raspberry is sweet, frothy and herbaceous and a brilliant new thirst-quenching delight.


Raspberry & Rosemary Blended Iced Tea

2 C. Hibiscus Tea, chilled
The juice of ½ a lemon
1/3 C. frozen raspberries
2-3 T. Rosemary Simple Syrup (recipe follows)

In a blender, combine the hibiscus tea, lemon juice, frozen raspberries and simple syrup.  Pour into a chilled glass and escape. 


Rosemary Simple Syrup

1 C. Water
1 C. Sugar
5 Rosemary Sprigs, finely chopped

In a small saucepan, heat the water, sugar and rosemary over medium heat.  Stir gently until the sugar dissolves.  Remove from the heat and cool.  Strain the mixture and discard the rosemary.